Think about how much time you spend in your kitchen every single day. From morning coffee routines to family dinners, your kitchen cabinets are constantly exposed to cooking splashes, steam, grease, and countless fingerprints. Yet somehow, cleaning kitchen cabinets often gets pushed to the bottom of our cleaning lists. Keeping them clean doesn’t just make your kitchen look better. It actually extends the life of your investment and maintains your home’s value.
Cleaning kitchen cabinets might seem straightforward, but there’s actually a right way and several wrong ways to tackle this essential household task. That’s exactly why kitchen and bath remodeling experts always emphasize cabinet care during consultations. You’ve already made a significant investment in your kitchen, so why not protect it? This comprehensive guide will show you exactly how to clean every type of cabinet safely and effectively.
Understanding Your Cabinet Materials
Before you start cleaning kitchen cabinets, you need to know what you’re working with. Different materials require different approaches, and using the wrong cleaning method can damage your cabinets permanently.
Wood cabinets are the most common type and require gentle care to preserve their finish. Laminate cabinets can handle slightly more aggressive cleaning, but still need careful attention. Painted cabinets require special consideration to avoid removing the paint finish.
Most cabinet manufacturers apply a protective finish that can be damaged by harsh chemicals or abrasive scrubbing. That’s why knowing your cabinet type is the first step toward effective cleaning.
What Is the Best Thing to Clean Kitchen Cabinets With?
The best cleaning solution for most kitchen cabinets is surprisingly simple: warm water mixed with a few drops of dish soap. This gentle combination effectively removes grease and grime without damaging most cabinet finishes.
For everyday cleaning, you’ll need:
- Microfiber cloths (they won’t scratch surfaces)
- Warm water
- Mild dish soap
- Clean, dry towels for drying
Avoid these common cleaning mistakes:
- Never use bleach or ammonia-based cleaners
- Skip the abrasive sponges or steel wool
- Don’t use furniture polish on kitchen cabinets
- Avoid excessive water that can seep into wood joints
According to Good Housekeeping, the key to effective cabinet cleaning is using the right amount of moisture. It’s enough to clean but not so much that water damage occurs.
How to Clean Kitchen Cabinets Without Removing the Finish
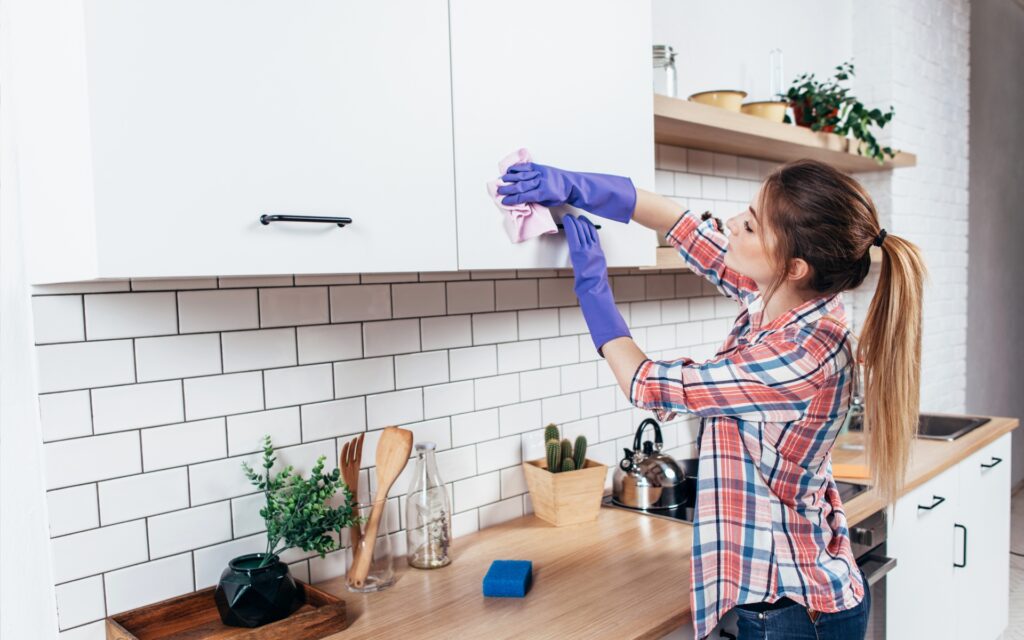
Protecting your cabinet finish while cleaning requires a gentle touch and the right technique. Start by removing everything from your cabinets and giving them a good dusting with a microfiber cloth.
The Basic Cleaning Process
Step 1: Prepare Your Cleaning Solution. Mix one tablespoon of dish soap with one quart of warm water. This ratio provides enough cleaning power without being too harsh on cabinet finishes.
Step 2: Test First. Always test your cleaning solution on a hidden area first. This step is crucial for avoiding damage to visible areas.
Step 3: Clean Systematically. Work from top to bottom, cleaning one cabinet door at a time. Dip your microfiber cloth in the solution, wring it out well, and gently wipe the cabinet surface.
Step 4: Rinse and Dry. Go over each surface with a clean, damp cloth to remove soap residue, then immediately dry with a soft towel.
This method works for most cabinet types and ensures you’re cleaning kitchen cabinets without causing damage to the finish.
Tackling Grease and Stains on Kitchen Cabinets
Grease buildup is the biggest enemy of clean kitchen cabinets. It attracts dirt, makes surfaces sticky, and can permanently stain if left untreated. The secret to removing grease is understanding that it needs to be dissolved, not just wiped away.
How to Get Sticky Grease Off Kitchen Cabinets
Stubborn grease requires a slightly stronger approach. Create a degreasing solution using:
- 2 cups warm water
- 1/4 cup white vinegar
- 2 tablespoons dish soap
This combination cuts through grease effectively while remaining safe for most cabinet finishes. Apply the solution with a microfiber cloth, let it sit for 2-3 minutes, then wipe clean with a damp cloth.
For really tough grease spots:
- Make a paste with baking soda and water
- Apply gently to the greasy area
- Let sit for 10 minutes
- Wipe away with a damp cloth
- Dry immediately
Cleaning Kitchen Cabinets Naturally
Many homeowners prefer natural cleaning solutions, especially in food preparation areas. Natural ingredients can be just as effective as commercial cleaners when used correctly.
White Vinegar Solution: Mix equal parts white vinegar and water for a natural degreaser that won’t harm most finishes.
Lemon and Salt Scrub: For stubborn stains on painted cabinets, create a gentle scrub with lemon juice and salt. The acid in lemon cuts through grease while salt provides mild abrasive action.
Olive Oil Polish: After cleaning, a small amount of olive oil on a soft cloth can restore shine to wood cabinets naturally.
How to Clean Wood Cabinets and Make Them Shine
Wood cabinets need special attention to maintain their natural beauty and protect the wood underneath. Cleaning kitchen cabinets made of wood requires understanding that wood is a living material that can expand, contract, and absorb moisture.
The Wood Cabinet Cleaning Process
- Daily Maintenance: Wipe down wood cabinets daily with a dry microfiber cloth to prevent dust and grease buildup. This simple step prevents most cleaning problems before they start.
- Weekly Deep Clean: Once a week, clean your wood cabinets with the soap and water solution mentioned earlier. Pay special attention to areas around handles and near the stove where grease accumulates most.
- Monthly Conditioning: Wood cabinets benefit from monthly conditioning with a product specifically designed for wood finishes. This step maintains the wood’s natural oils and prevents drying and cracking.
Restoring Shine to Wood Cabinets
To make wood cabinets shine, avoid commercial furniture polishes that can build up over time. Instead, try these natural methods:
- Olive Oil Treatment: Apply a small amount of olive oil to a soft cloth and buff in circular motions
- Vinegar and Oil Mixture: Combine 1/4 cup olive oil with 1/4 cup white vinegar for a natural wood polish
- Commercial Wood Cleaner: Use products specifically designed for kitchen cabinets, not general furniture polish
The Family Handyman recommends avoiding silicone-based polishes in kitchens because they can interfere with future refinishing projects (The Family Handyman, 2023).
Special Considerations for Different Cabinet Styles
Painted Cabinets
Painted cabinets require gentle cleaning to avoid removing the paint. Use only mild soap solutions and soft cloths. Never use abrasive cleaners or scrubbers that might scratch the paint surface.
Laminate Cabinets
Laminate surfaces can handle slightly more aggressive cleaning but avoid harsh chemicals that might cause the laminate to peel or discolor. The soap and water method works perfectly for laminate cabinets.
Glass-Front Cabinets
Clean the glass separately using a glass cleaner or vinegar solution. Clean the frame using the appropriate method for its material (wood, painted, or laminate).
Professional Tips for Cabinet Maintenance
Prevention Is Key
The best way to keep cabinets clean is to prevent problems before they start:
- Install a good range hood to reduce grease in the air
- Wipe spills immediately
- Use cabinet liners in areas prone to spills
- Clean handles and knobs daily since they get the most contact
Hardware Cleaning
Don’t forget about cabinet hardware when cleaning kitchen cabinets. Handles, knobs, and hinges need regular attention too:
- Remove hardware monthly for thorough cleaning
- Use appropriate cleaners for the metal type
- Dry completely before reinstalling to prevent water damage
Seasonal Deep Cleaning
Plan for seasonal deep cleaning sessions where you clean inside and outside all cabinets. This is also a good time to reorganize and check for any maintenance issues.
Common Mistakes to Avoid
Using Too Much Water
Excess water can seep into wood joints and cause swelling, warping, or finish damage. Always wring out cloths well and dry surfaces immediately after cleaning.
Ignoring Cabinet Interiors
The inside of your cabinets needs attention, too. Food spills and dust can accumulate, creating unpleasant odors and attracting pests.
Skipping the Drying Step
Always dry cabinet surfaces immediately after cleaning. Standing water can damage finishes and create water spots.
Using Harsh Chemicals
Bleach, ammonia, and other harsh chemicals can permanently damage cabinet finishes. Stick to mild, kitchen-safe cleaners.
When to Call Professionals
Sometimes cleaning kitchen cabinets requires professional help. Consider calling experts when:
- Cabinets have extensive grease buildup that won’t respond to home cleaning
- The finish is damaged or worn
- You’re dealing with antique or very expensive cabinets
- Stains have penetrated the wood or finish
Professional cabinet cleaning services have specialized tools and products that can restore cabinets without damage. They can also provide refinishing services if your cabinets need more than just cleaning.
Conclusion
Cleaning kitchen cabinets doesn’t have to be a dreaded chore. The right approach, gentle products, and regular maintenance keep your cabinets looking their best for years to come. Remember that consistency is more important than intensity. Regular light cleaning prevents the buildup that requires aggressive scrubbing.
Start with the basics: mild soap, warm water, and microfiber cloths. This simple combination handles most cleaning challenges safely and effectively. For tougher jobs, natural solutions like vinegar and baking soda provide extra cleaning power without risking damage to your investment.
Your kitchen cabinets are one of the most visible features in your home. If you’re considering a complete kitchen renovation or need expert advice on cabinet care and maintenance, CabinetLand is here to help. Sometimes the best cleaning routine can’t restore cabinets that have seen better days, and that’s when professional guidance makes all the difference.

